Configuring Unraid and a Synology NAS with a UPS
- Jorge Morán
- Homelab
- April 24, 2024
- 4 min
We’ve been having frequent power outages where I live, so I’ve had to acquire a UPS to make sure my devices have a chance to safely turn off without risking data loss.
For this configuration, we’ll connect our USB-enabled APC UPS to the Unraid server. This means it’ll work as the main node, and the Synology nass will be the client.
We’ll set up everything in a way that the Synology NAS only has to set the Unraid server’s IP and it’ll immediately start working. Synology does not provide a way to change the account it uses to connect to a network UPS server, so we’ll need to use the default credentials Synology defined by default.
First, we’ll need to install Network UPS Tools (NUT) on our Unraid server. We’ll use the version created by desertwitch. To do so, let’s navigate to /Apps in our Unraid server and search for nut.
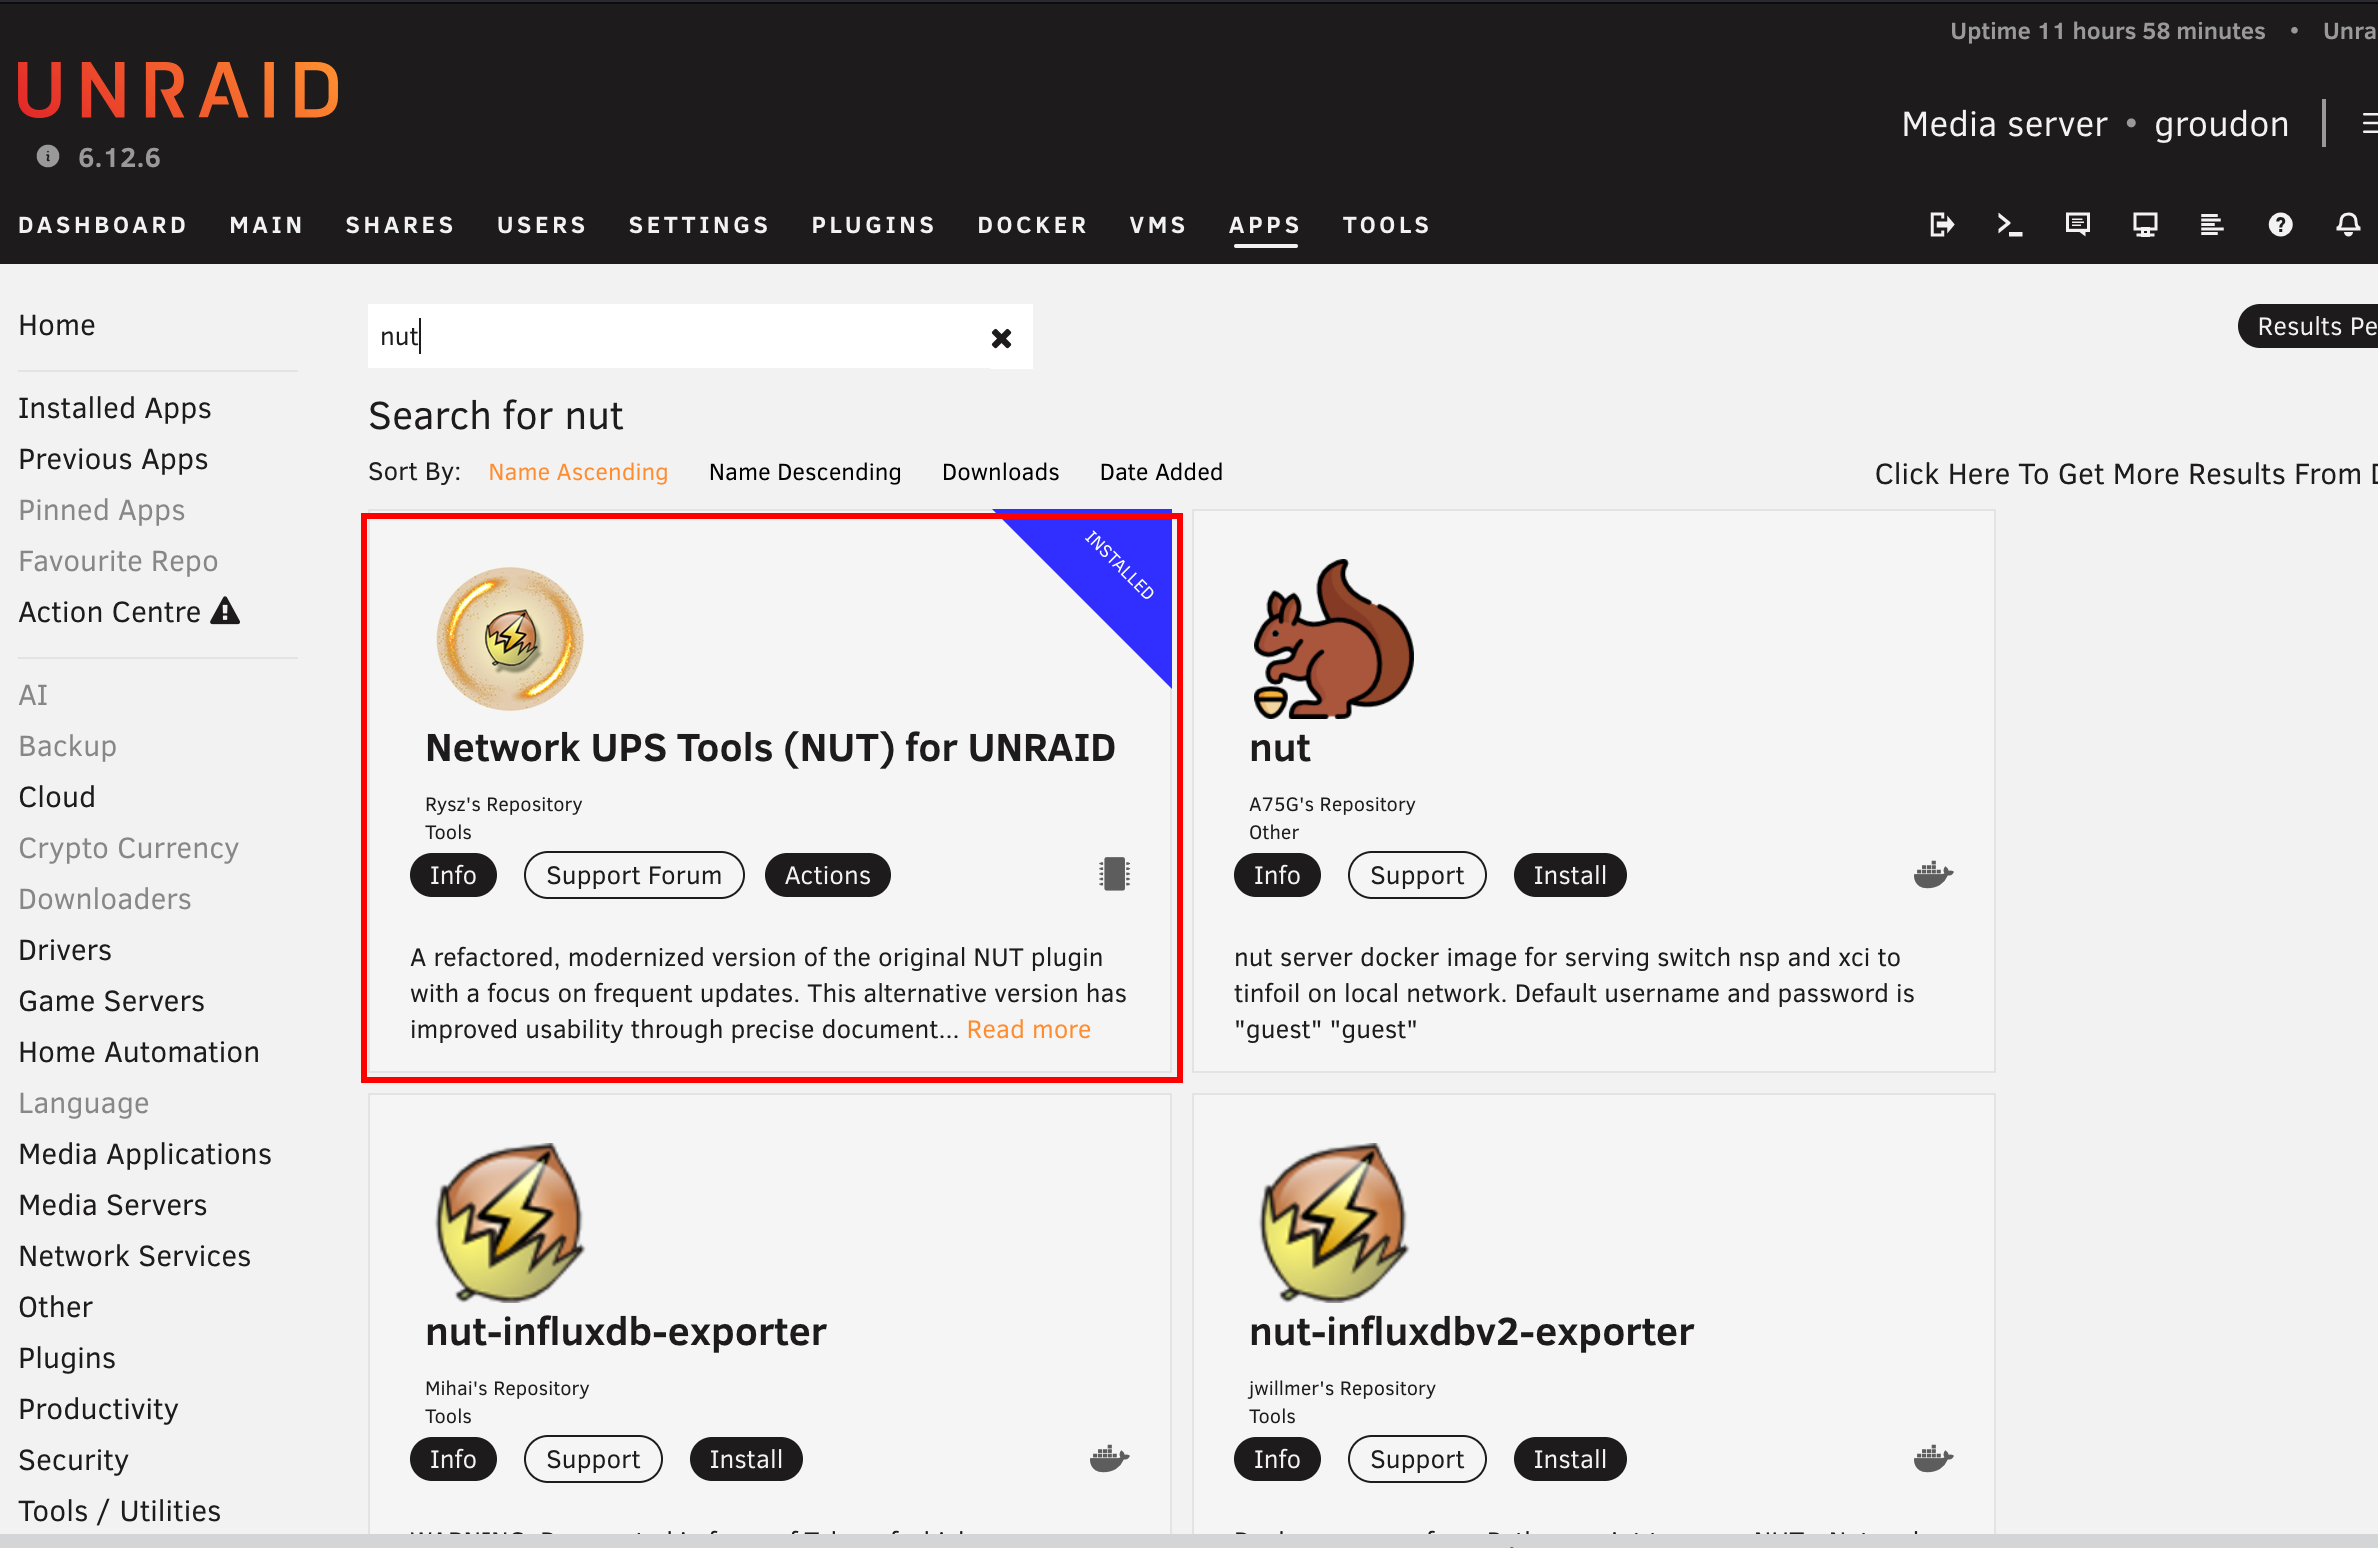
We’ll find a list of options, but we need to make sure to select the one created by desertwitch. After installing it, we can confirm that we have it by browsing to /Plugins. We should find an entry with the plugin name.

Now that we’re sure we have the plugin, we can proceed to configure it. To do so, we can browse to /Settings/NUTsettings.
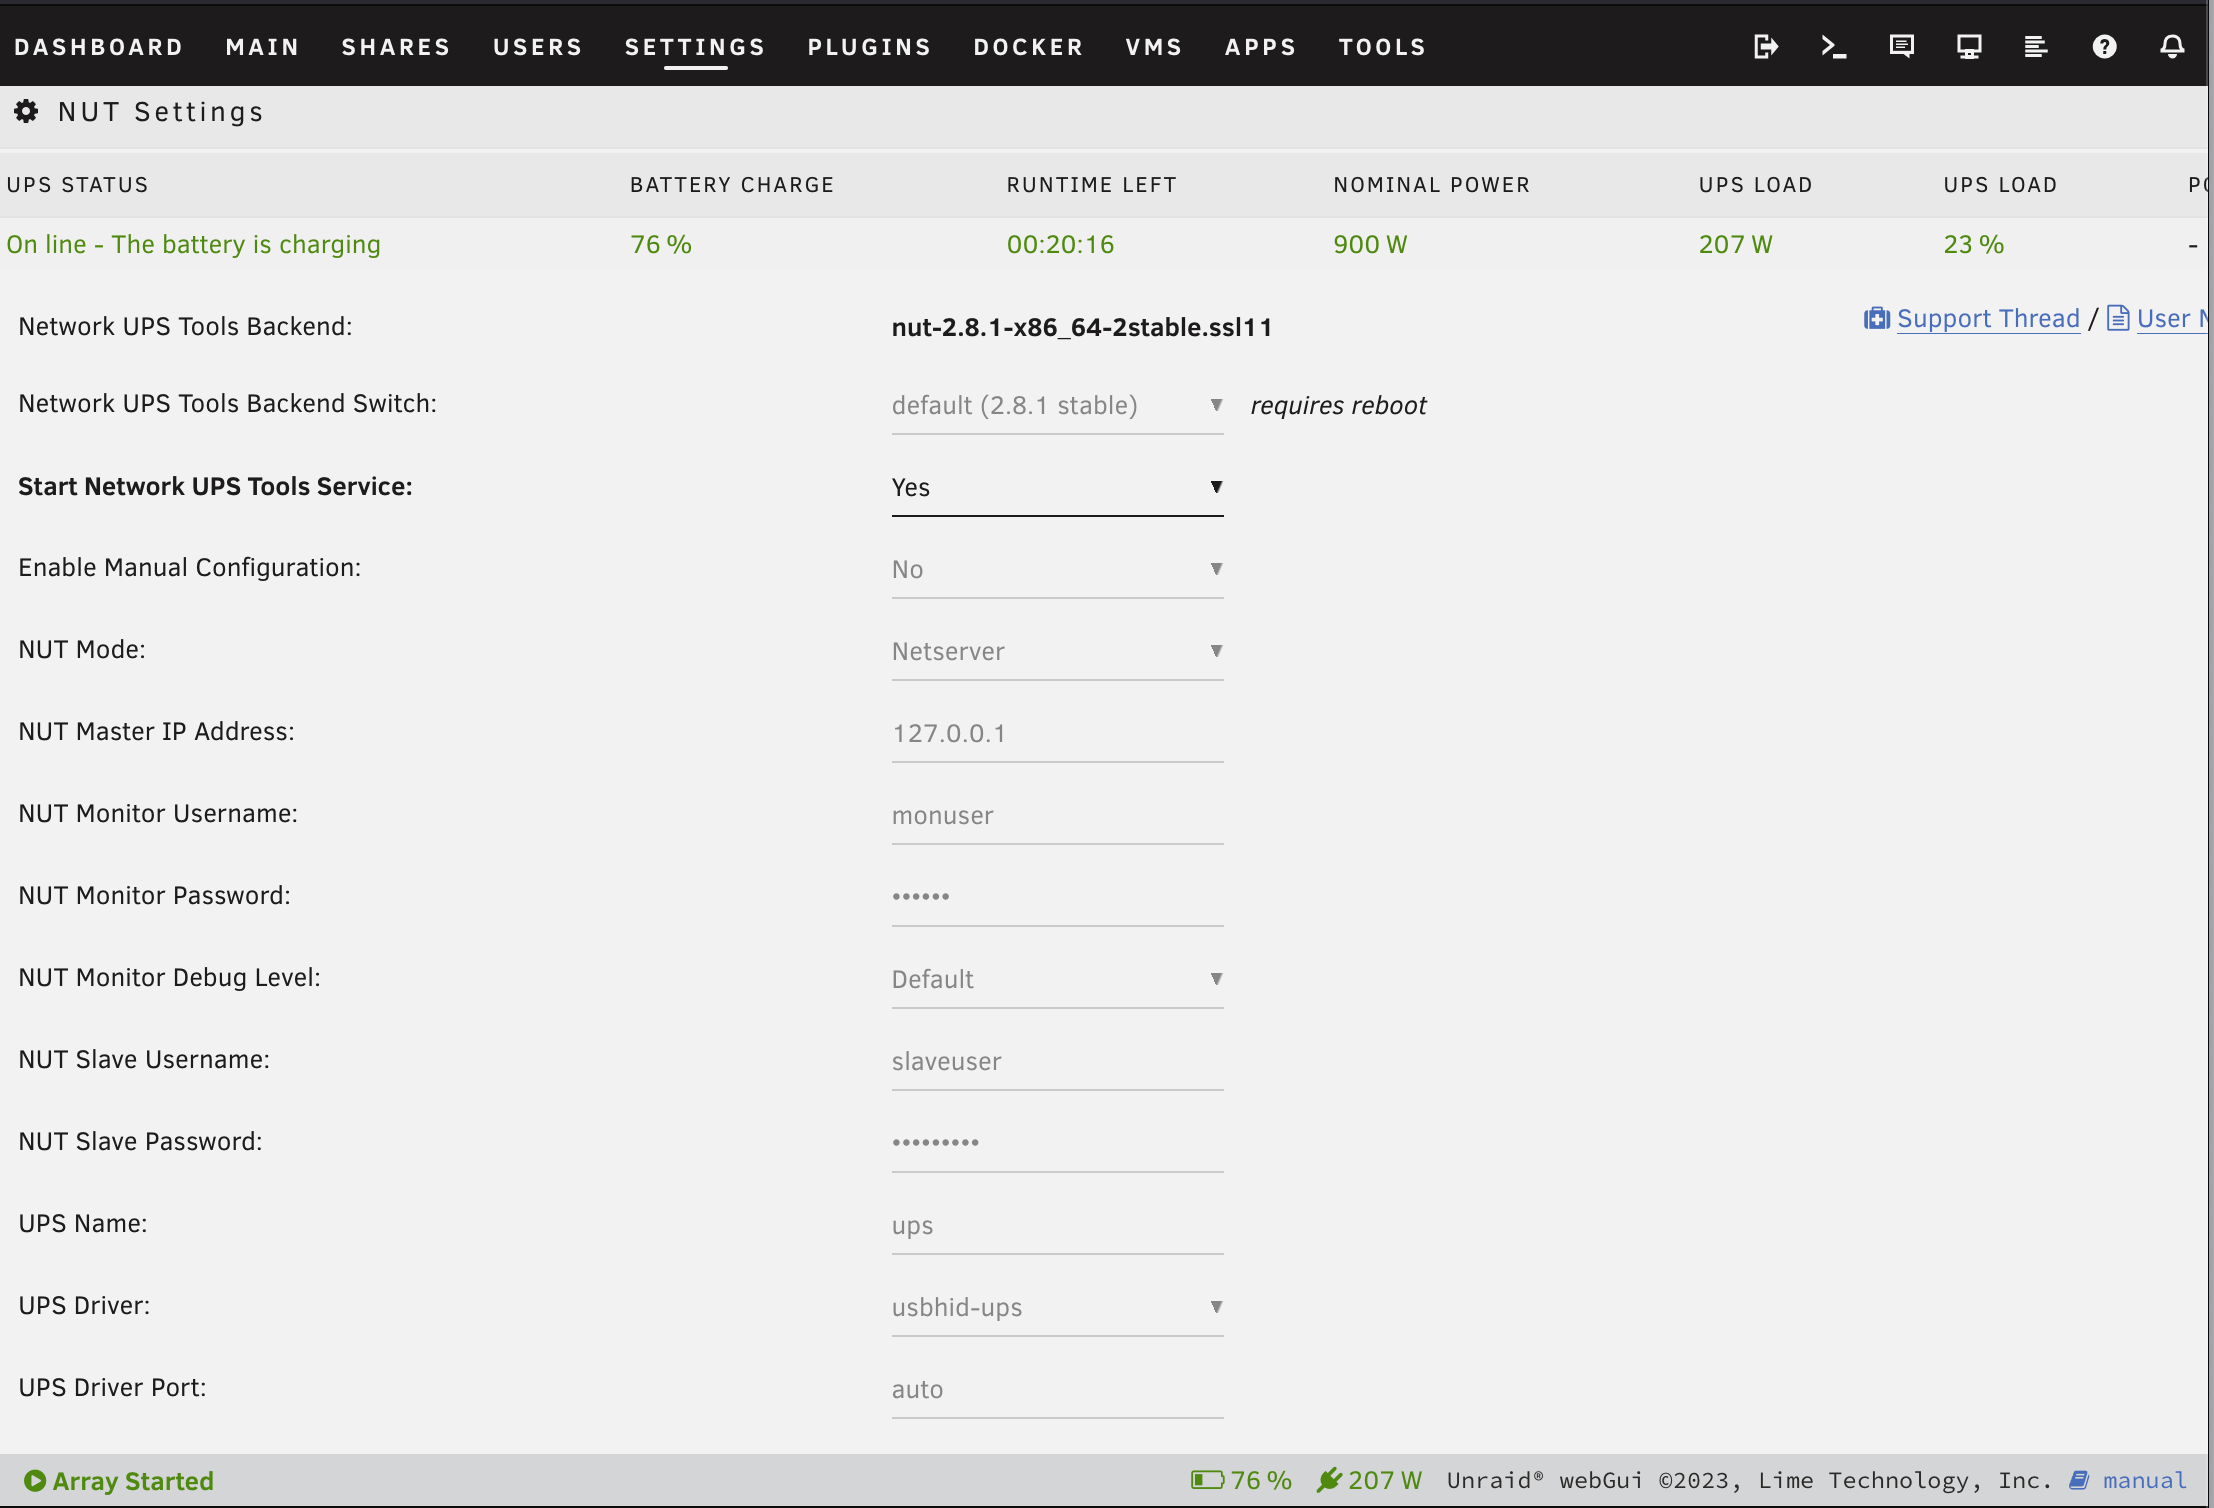
The image above contains a usable configuration. From there, we can highlight that the NUT Mode is set to netserver, because we want our Synology NAS to be able to connect to it. Also, the driver we’re using is usbhid-ups. At this point our priority is to make sure the plugin can interact with the UPS, so let’s try to set the least amount of required values and click on the Apply button.
If everything went OK, we should be able to inspect the UPS’ details via the Unraid interface.
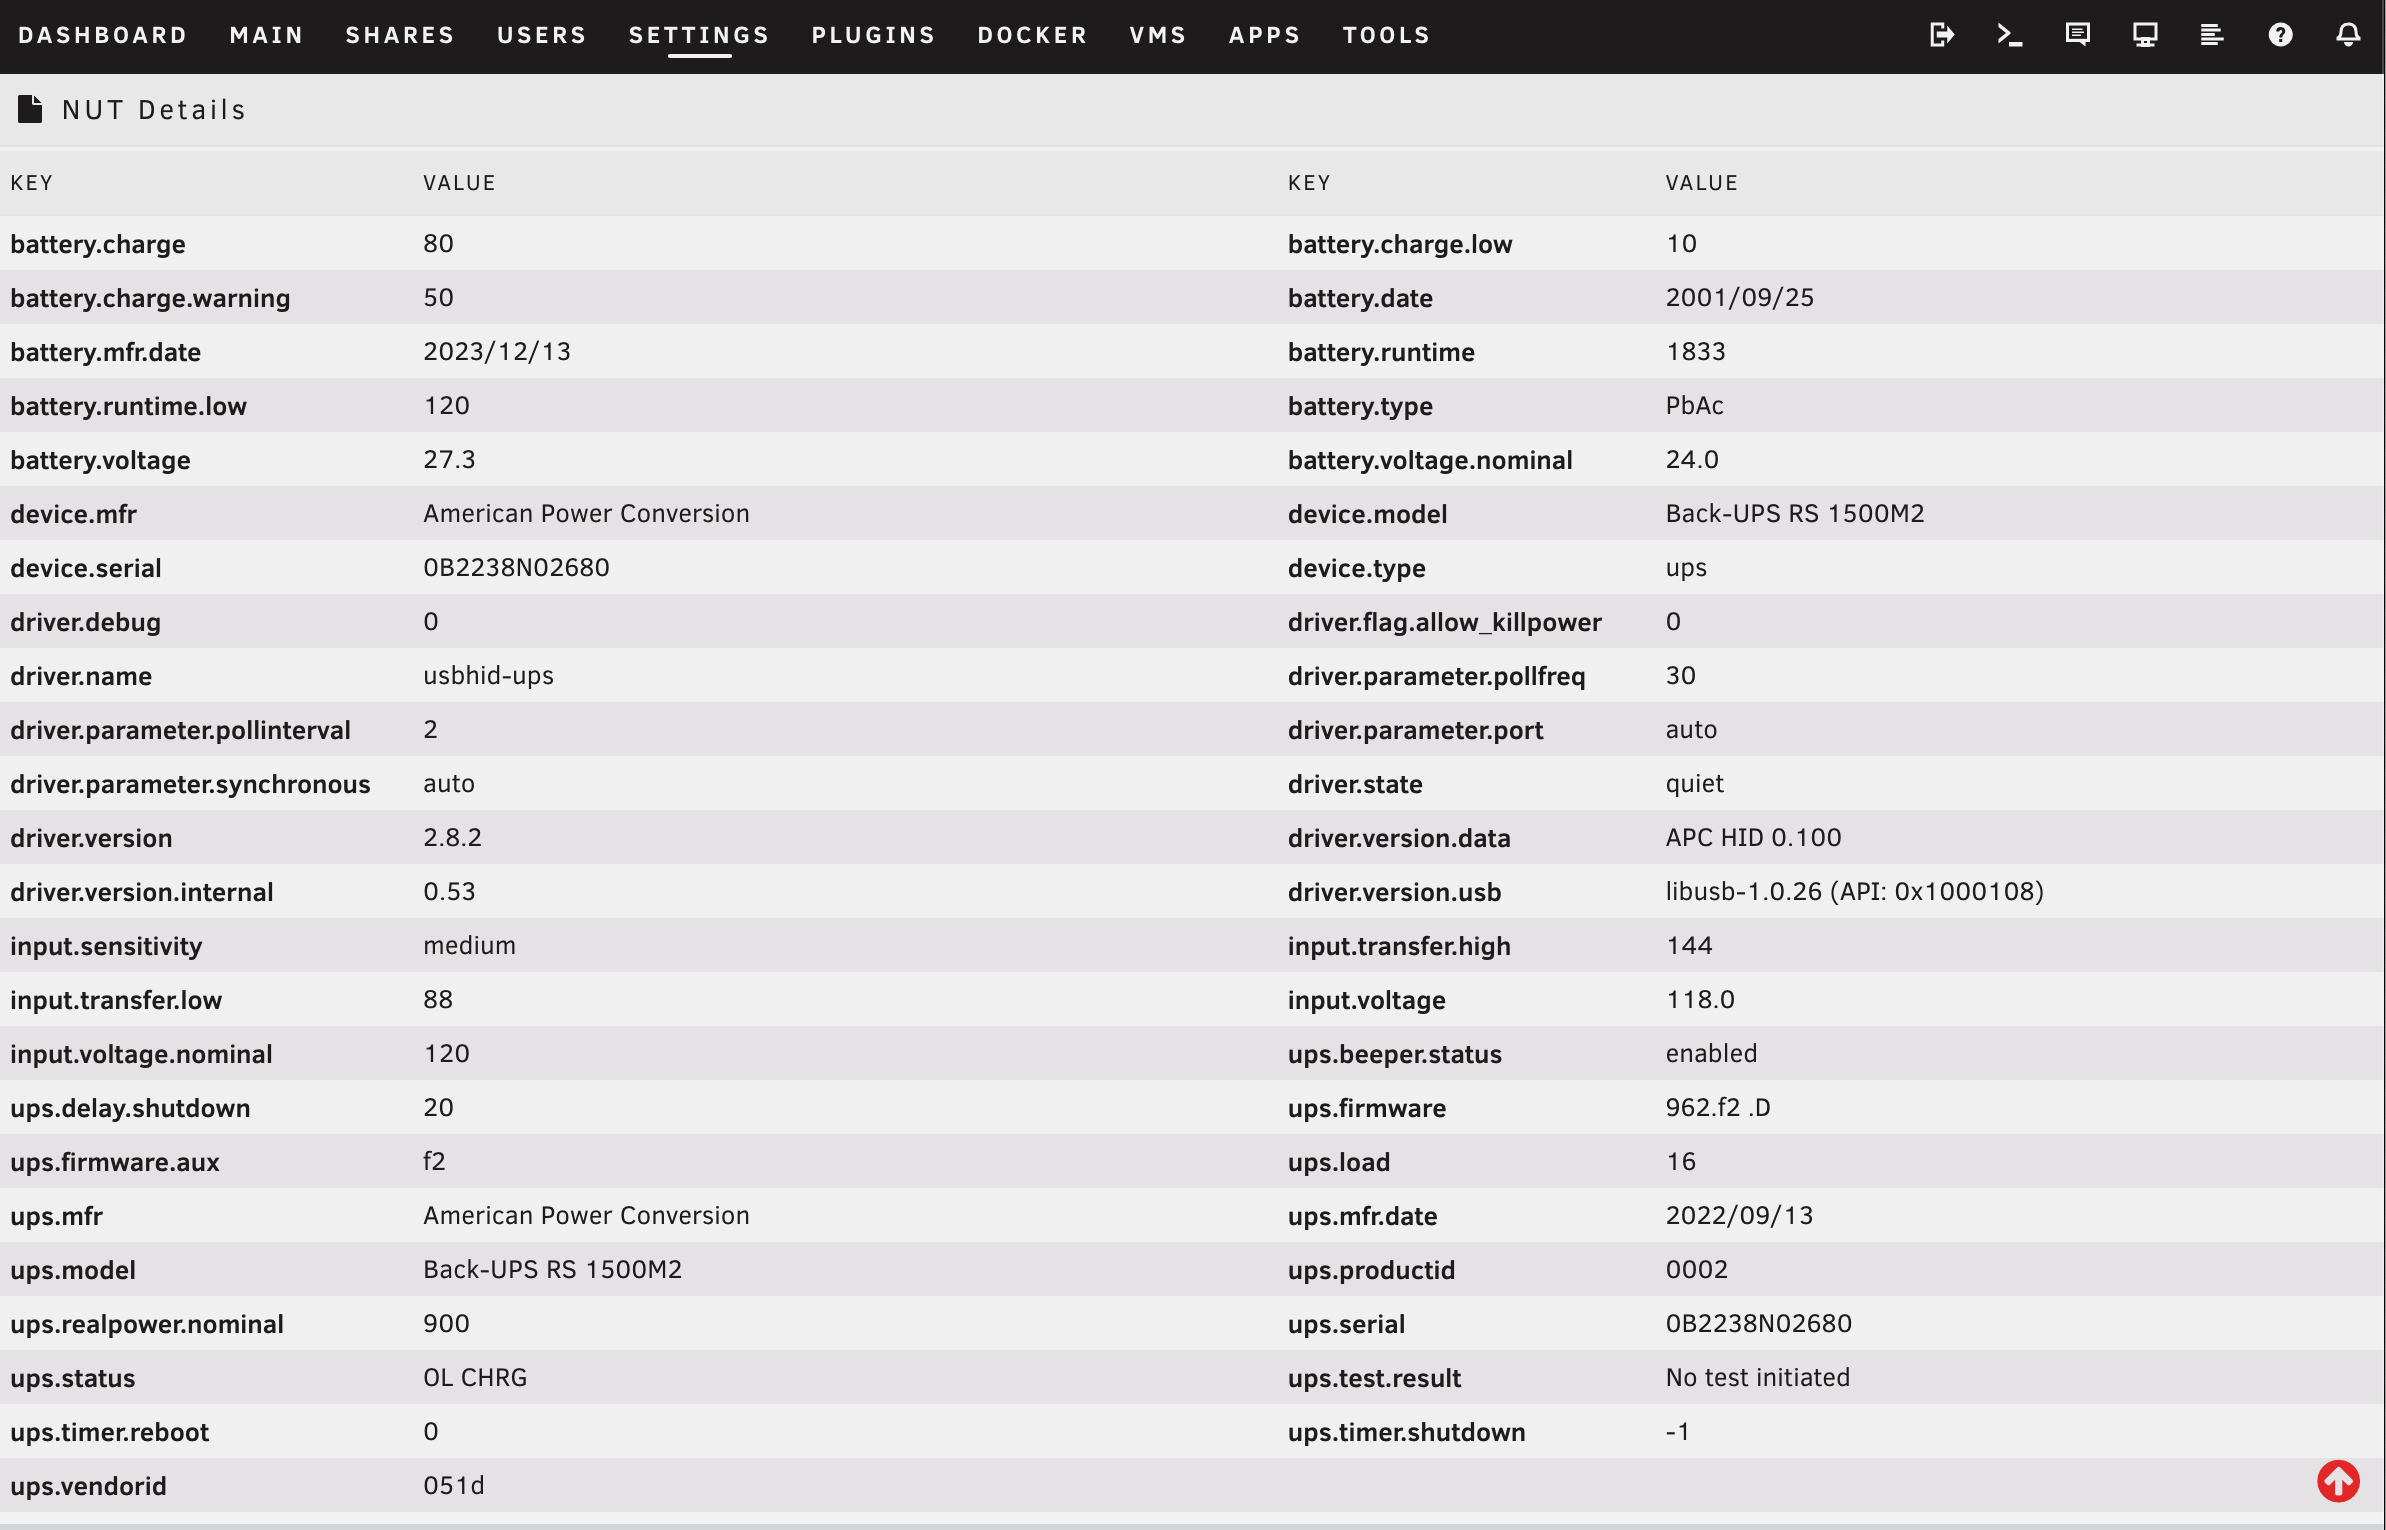
Before moving on to the NAS, let’s check where this configuration is stored. Although in most circumstances NUT’s configuration is placed in nut.conf, ups.conf, upsd.conf, upsd.users, upsmon.conf, and upsched.conf. In Unraid we’ll find most of the values we previously analyzed in /boot/config/plugins/nut-dw.cfg. It’s important to note that we’re defining everything inside /boot because we need this configuration to persist. Let’s inspect an adapted version made to interact with a Synology NAS.
Warning
Due to the fact that Synology requires specific credentials to interact with the NUT server, this is not secure enough for a production environment. This is only recommended for home labs. And even there you need to be careful.
SERVICE="enable"
POWER="auto"
POWERVA="0"
POWERW="0"
MANUAL="disable"
NAME="ups"
MONUSER="monuser"
MONPASS="c2VjcmV0"
SLAVEUSER="slaveuser"
SLAVEPASS="c3Ryb25nc2xhdmVwd2QK"
DRIVER="usbhid-ups"
SERIAL=""
PORT="auto"
DEBLEVEL="default"
DEBLEVELMON="default"
IPADDR="127.0.0.1"
MODE="netserver"
SHUTDOWN="sec_timer"
BATTERYLEVEL="20"
SECONDS="240"
TIMEOUT="180"
UPSKILL="disable"
REPLBATTMSG="disable"
POLL="15"
COMMUNITY="public"
FOOTER="enable"
FOOTER_STYLE="0"
REFRESH="enable"
INTERVAL="10"
RUNTIME="battery.runtime"
BACKEND="default"
STATISTICS="disable"
STATSPOLL="30min"
STATSOVERRIDE="disable"
STATSCHART1VAR="ups.realpower"
STATSCHART1TXT="Power Draw (in W)"
STATSCHART2VAR="battery.charge"
STATSCHART2TXT="Battery Charge (in %)"
STATSCHART3VAR="battery.voltage"
STATSCHART3TXT="Battery Voltage (in V)"
STATSCHART4VAR="input.voltage"
STATSCHART4TXT="Input Voltage (in V)"
STATSCHART5VAR="input.frequency"
STATSCHART5TXT="Input Frequency (in Hz)"
STATSCHART6VAR="output.voltage"
STATSCHART6TXT="Output Voltage (in V)"
STATSCHART7VAR="output.frequency"
STATSCHART7TXT="Output Frequency (in Hz)"
RTUNIT="seconds"
We can modify most of the parameters according to our needs. However, we need to make sure that MONUSER is set to monuser and MONPASS needs to be set to c2VjcmV0, which is the base64 encoding of the word secret.
We can set these values using the web interface. The configuration file we are presenting here is only for reference.
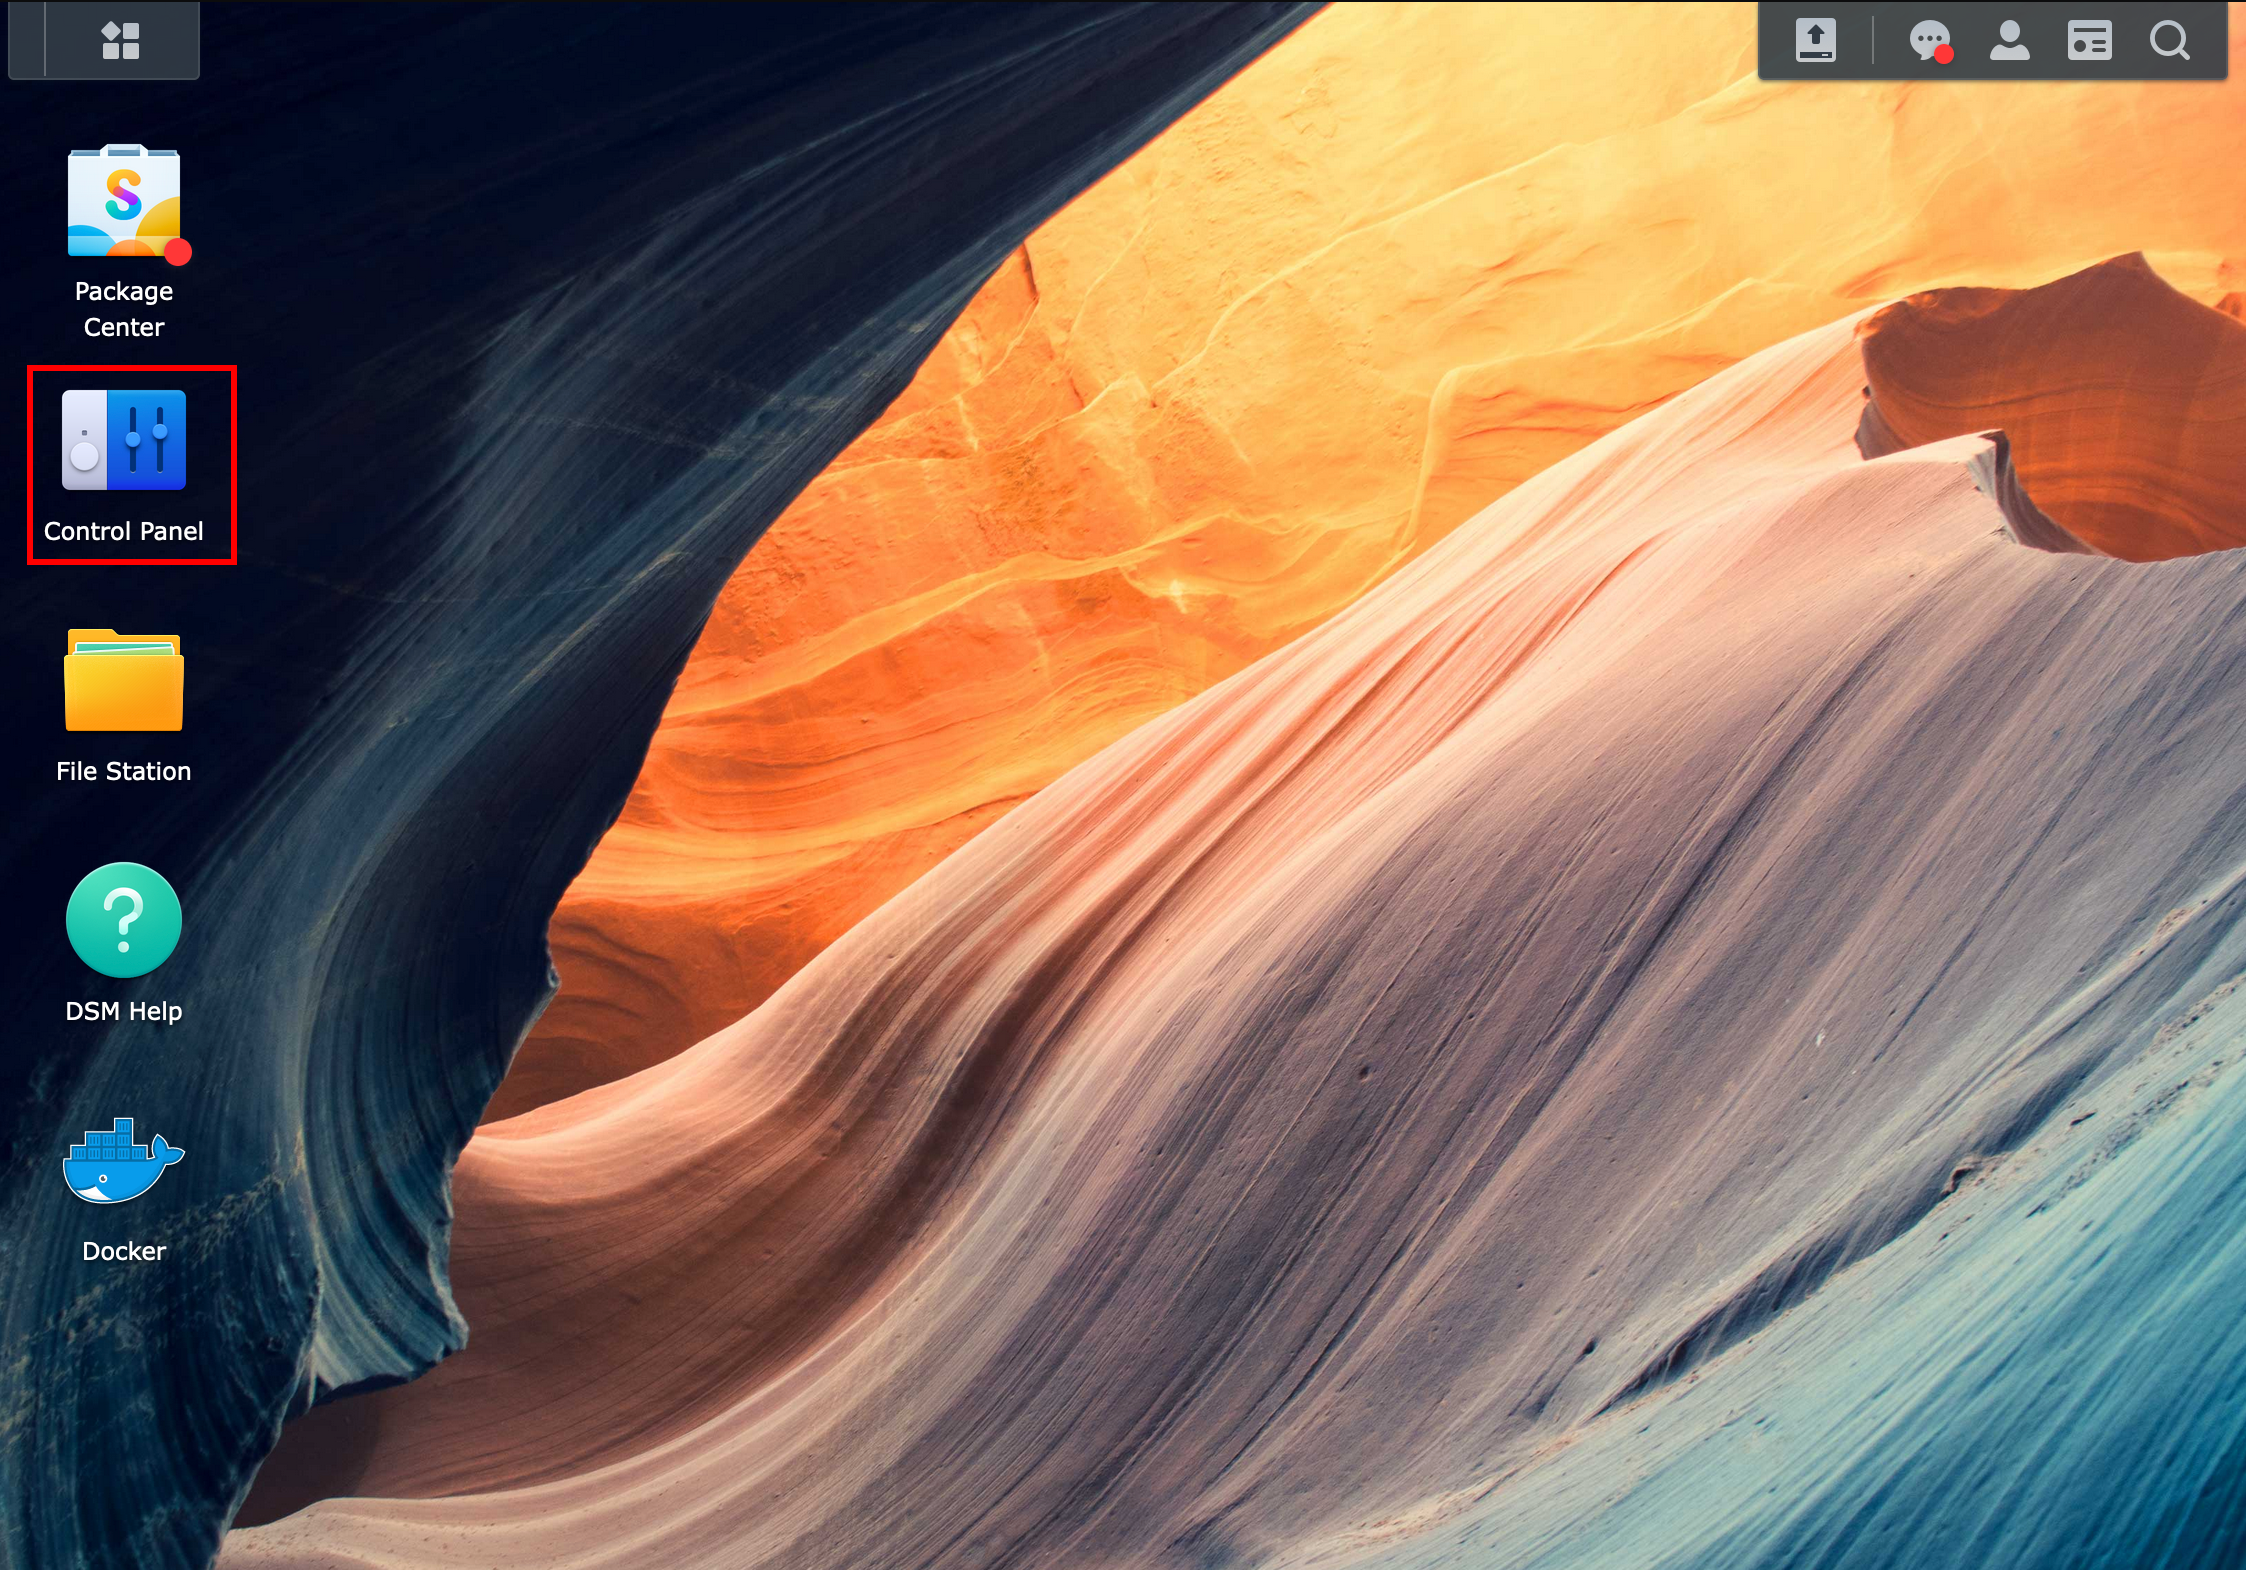
With this in place, we can continue with NAS’ configuration. After authenticating, we need to select Control Panel.
Note
This applies to DSM >=7.0. It might be slightly different in earlier versions.
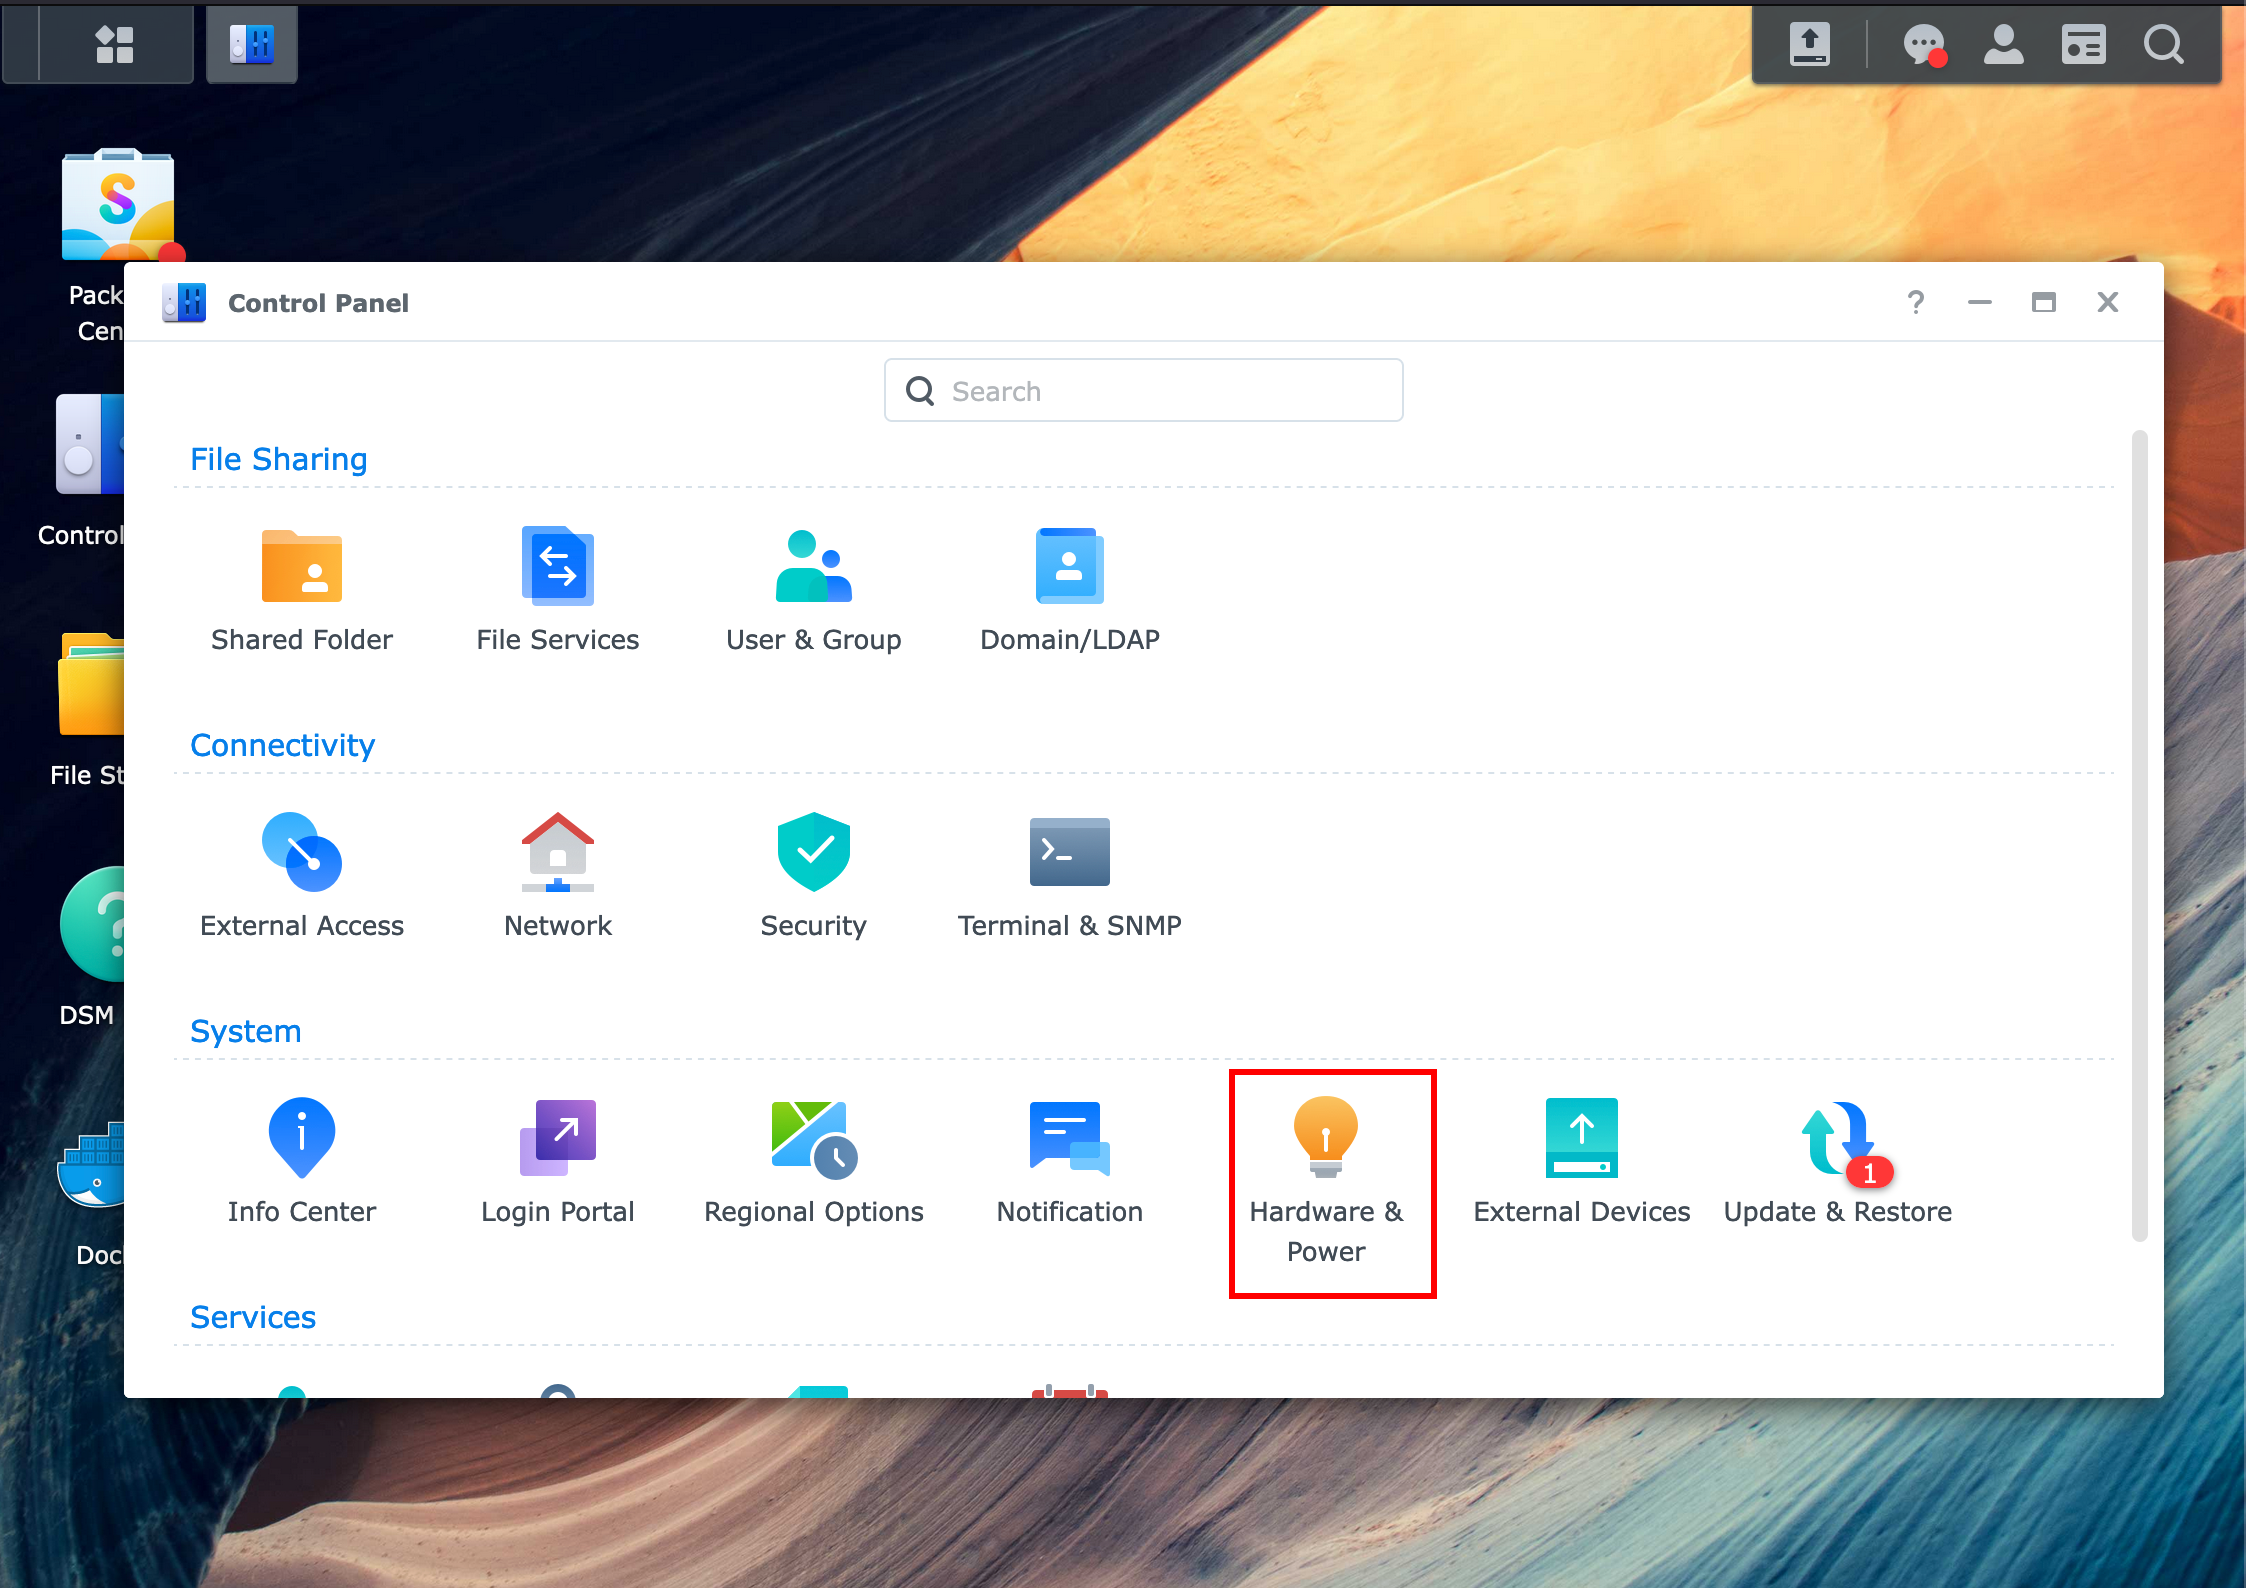
Next, let’s select Hardware & Power.
In this section, we’ll switch to the UPS tab. Once we get there, we need to modify a few fields. The UPS type needs to be set to Synology UPS Server. We can also define a time before the NAS enters standby mode, in this case, it’s set to one minute, but it’s not a problem if we set it to a higher value. Finally, we have to define the IP of our Unraid server, which is where NUT is running.
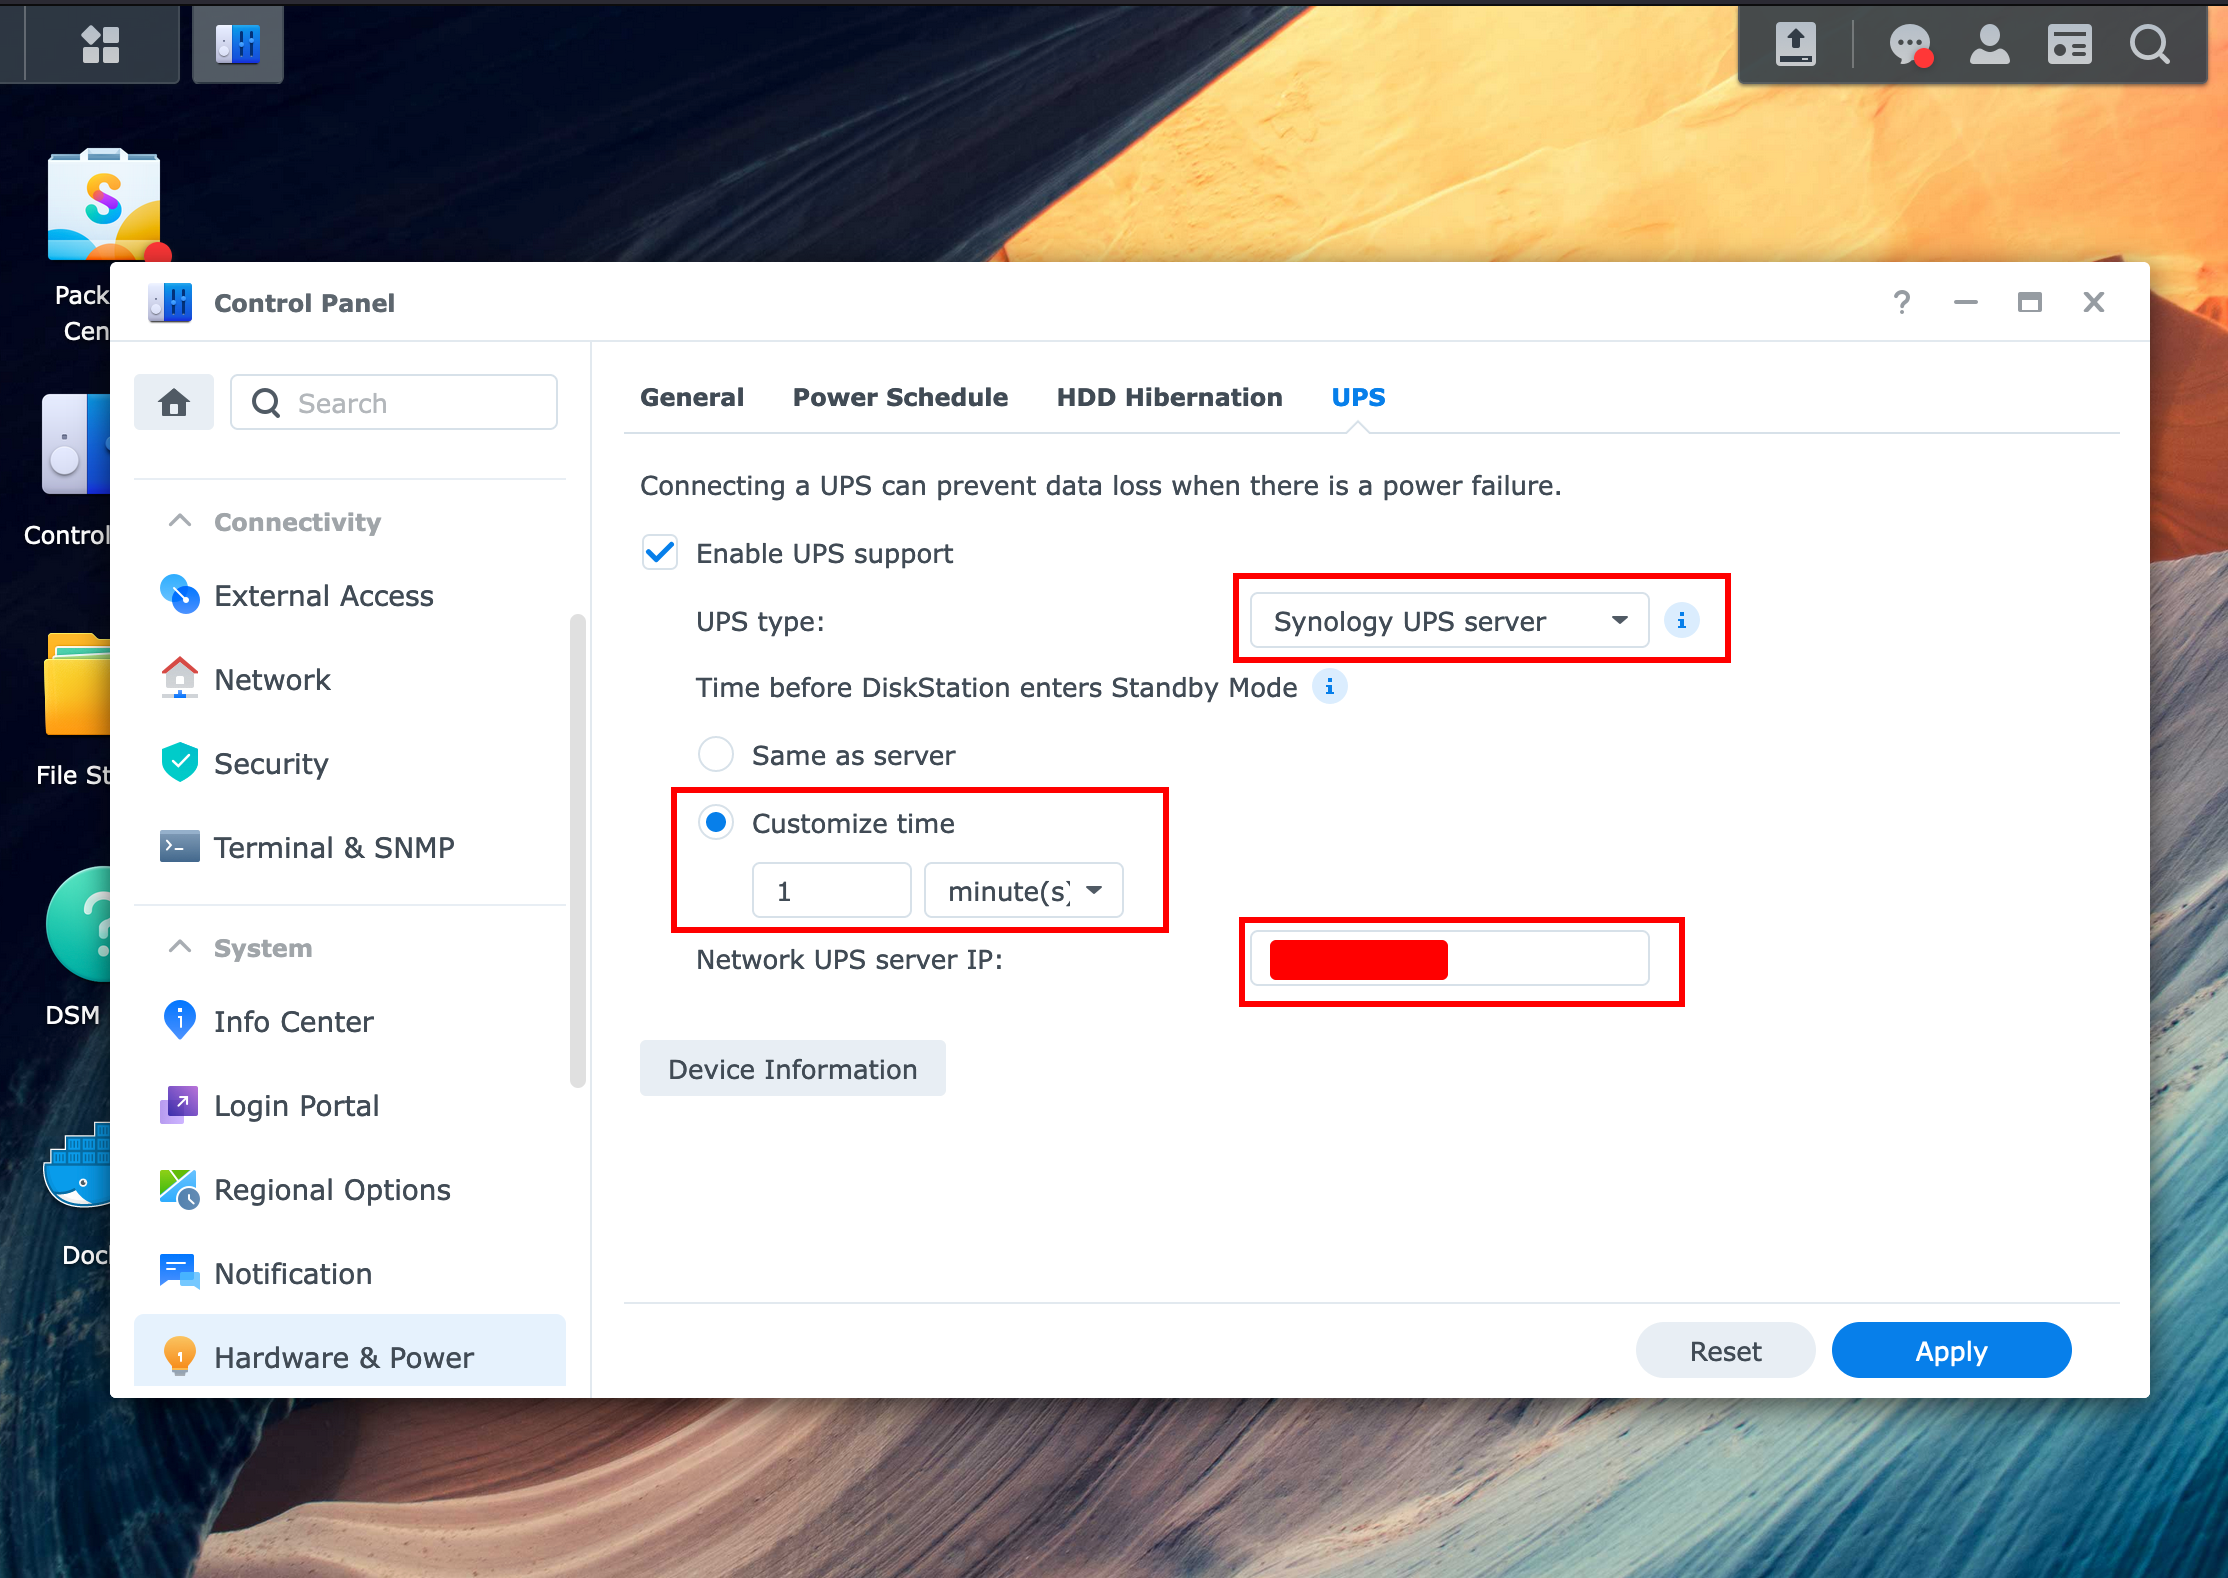
By this point, we can proceed to click the Device Information button.
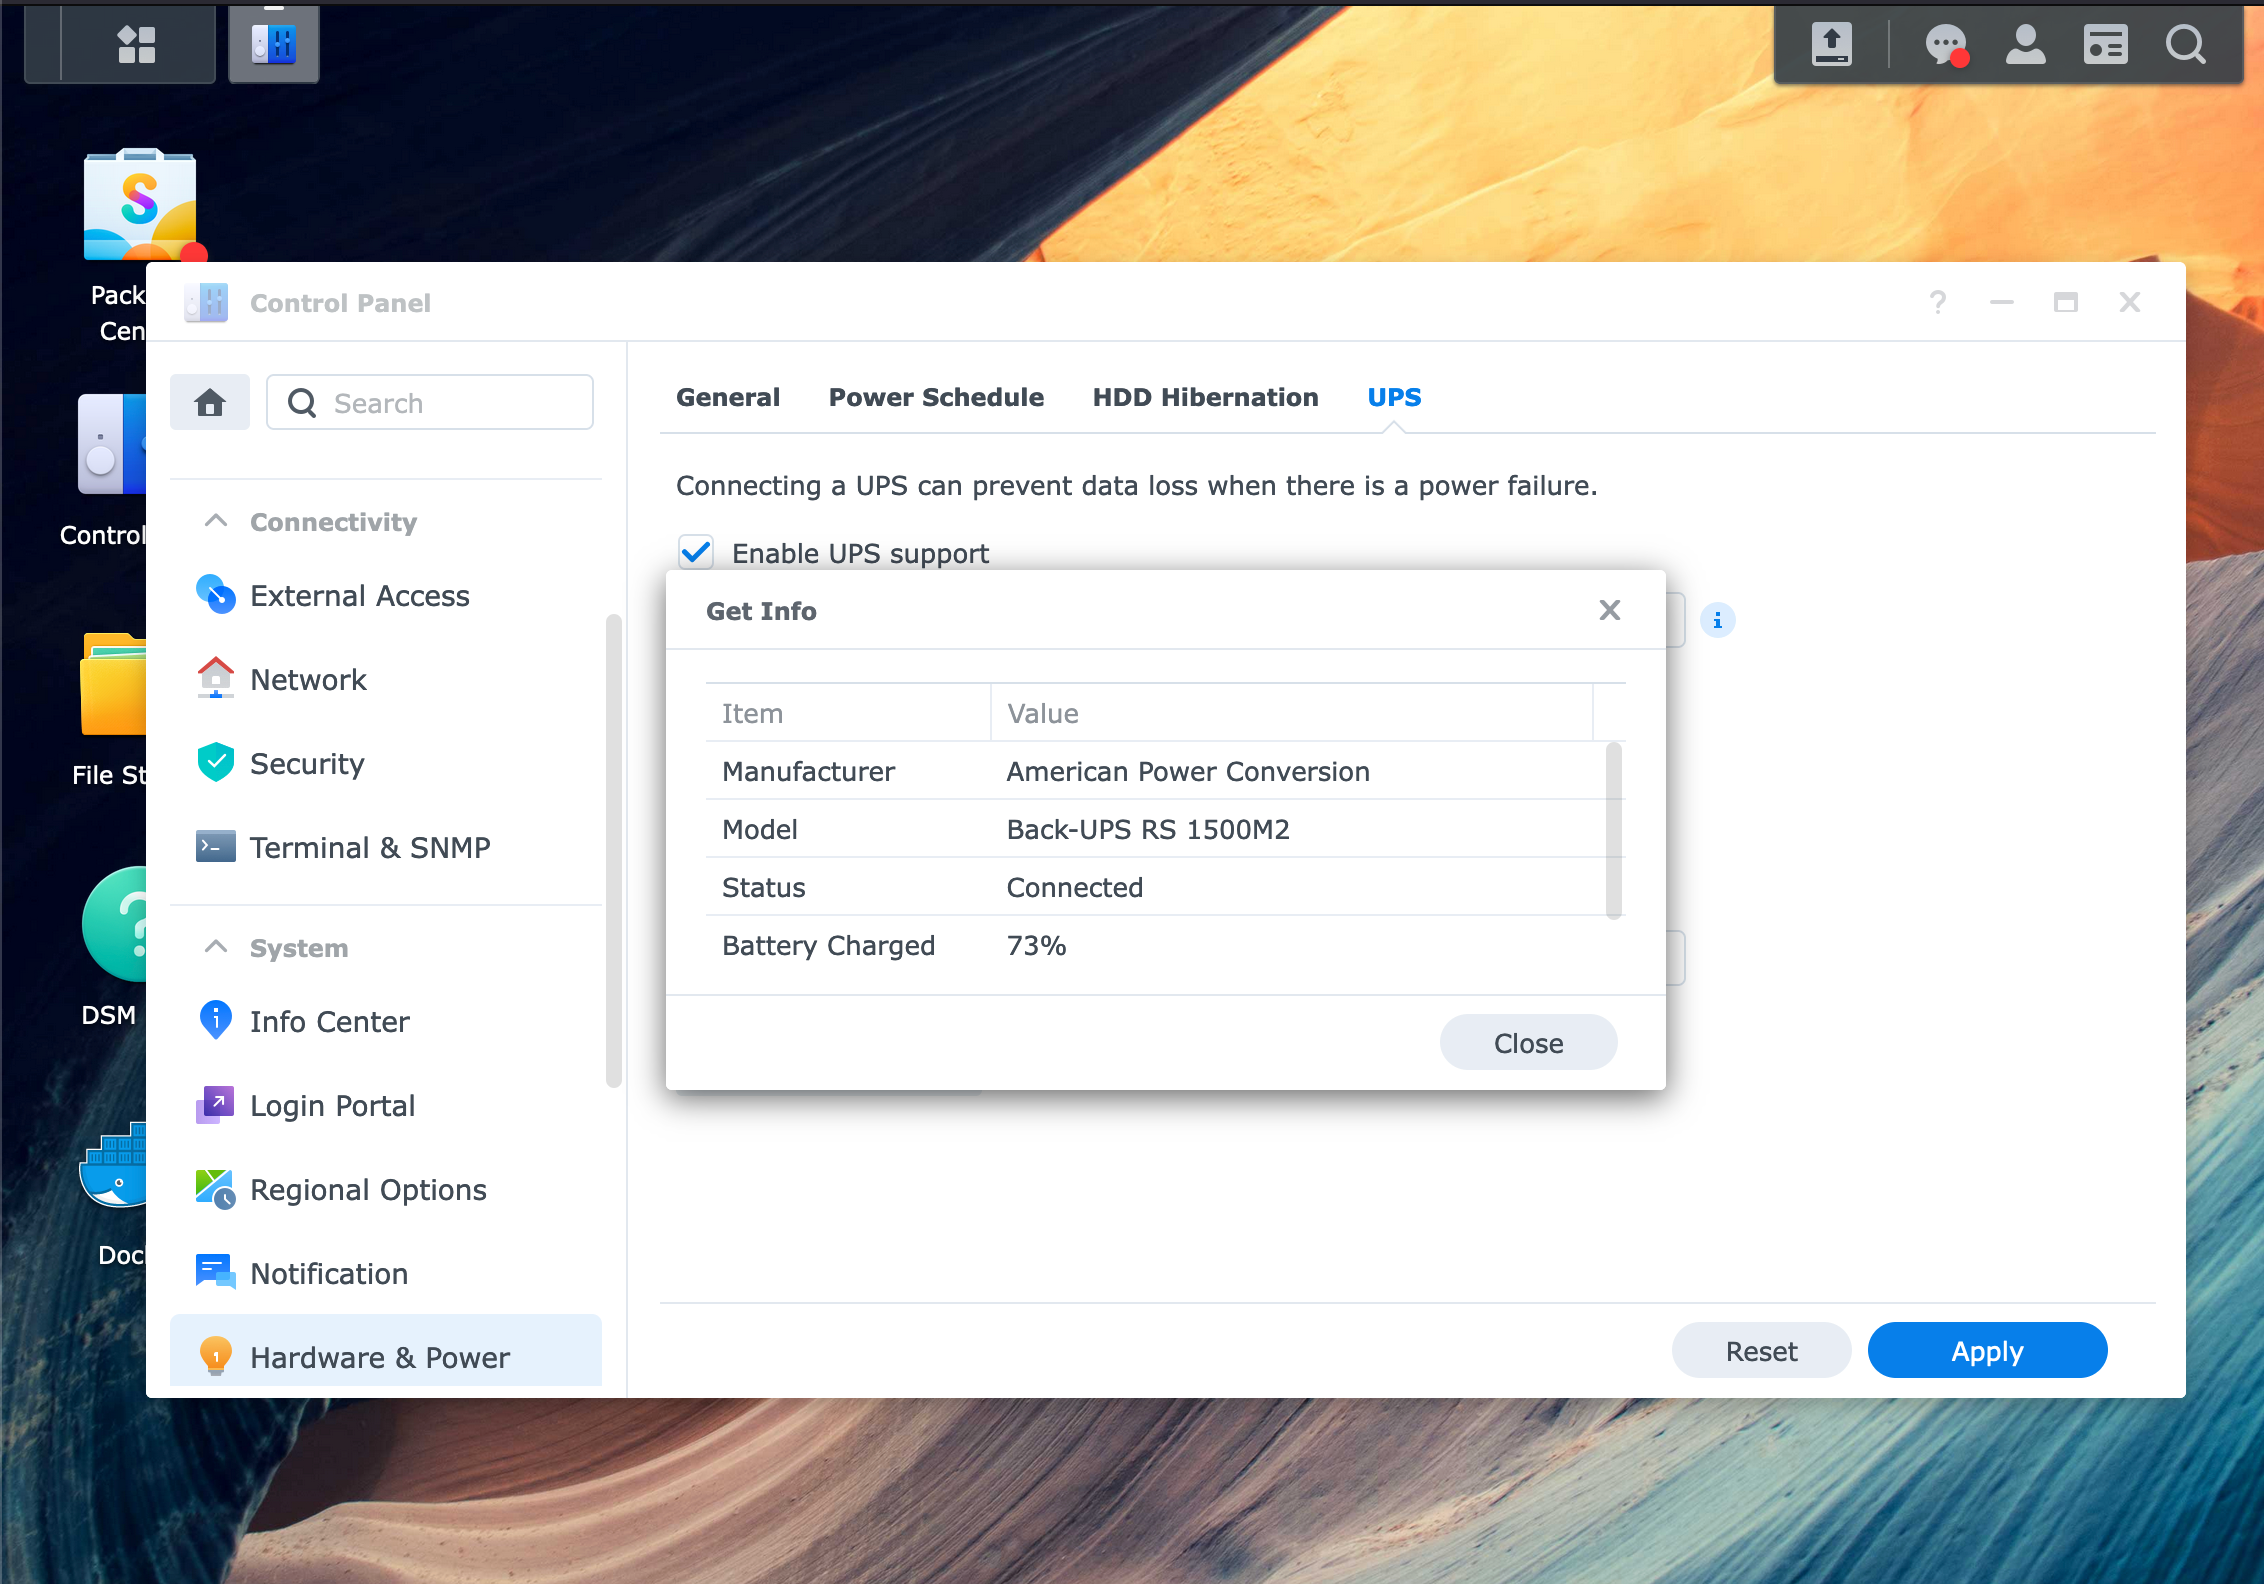
If everything went right, we should be presented with a pop-up that contains the UPS details.
In this post, we have analyzed how to connect an APC UPS to Unraid and configure a NUT server so that a Synology NAS can consume events.
